Skip to content

Update Resource Pools

Last updated on

To alter an existing Resource Pool, go to “File Storage > Resource Pools”. Click on the respective Resource Pool in the list, in this case “test_resource_pool_002”.
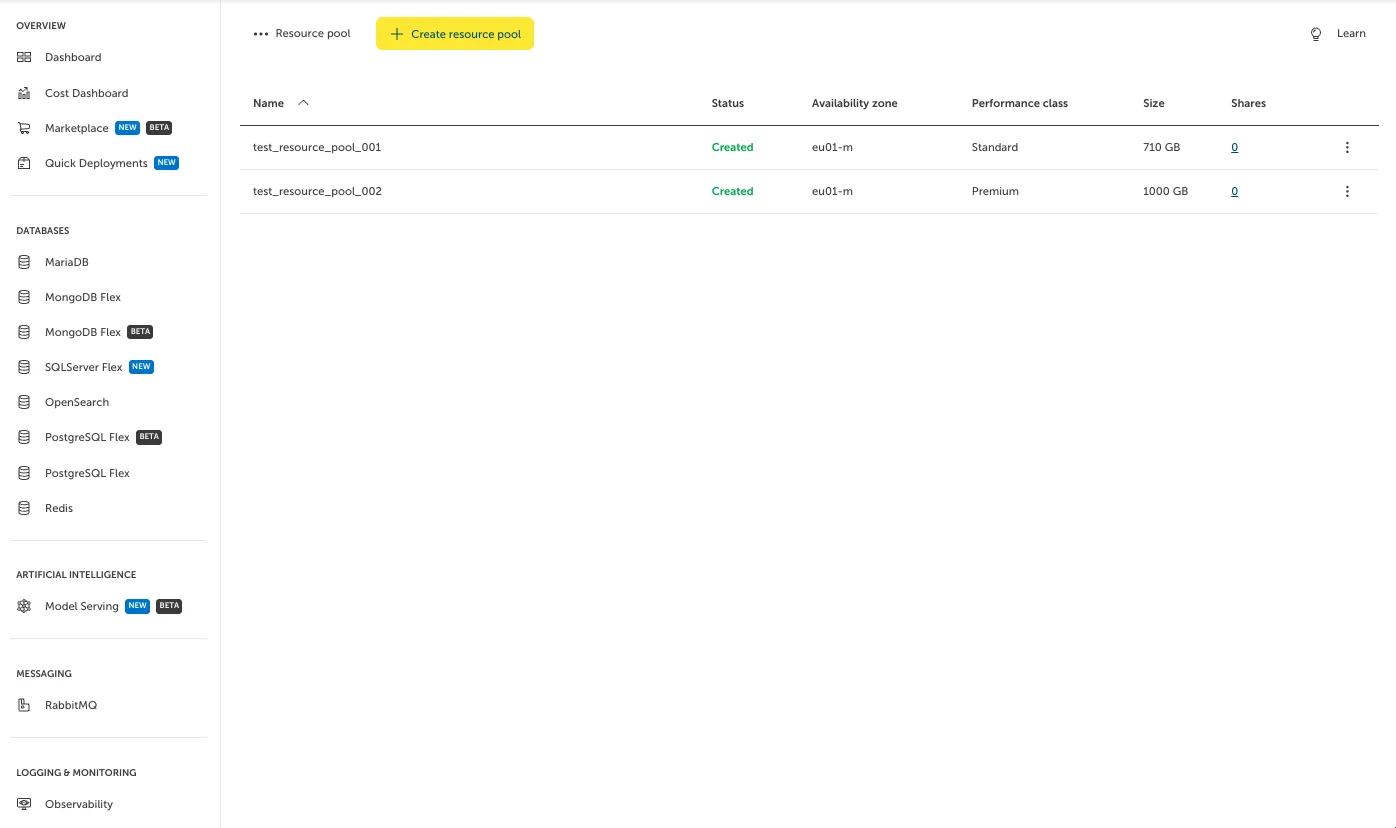
Screenshot of the "Resource pool" overview page in the STACKIT Portal. The left-hand sidebar displays service categories such as Databases, Artificial Intelligence, and Messaging. The main content area features a yellow "Create resource pool" button and a table listing active pools with a "Created" status, located in availability zone "eu01-m". Their respective sizes are 710 GB (Standard performance class) and 1000 GB (Premium performance class).

You will be forwarded to a page where information about the selected Resource Pool is presented. This information includes the mount path. In case you want to edit this information, click on the “Edit” button.
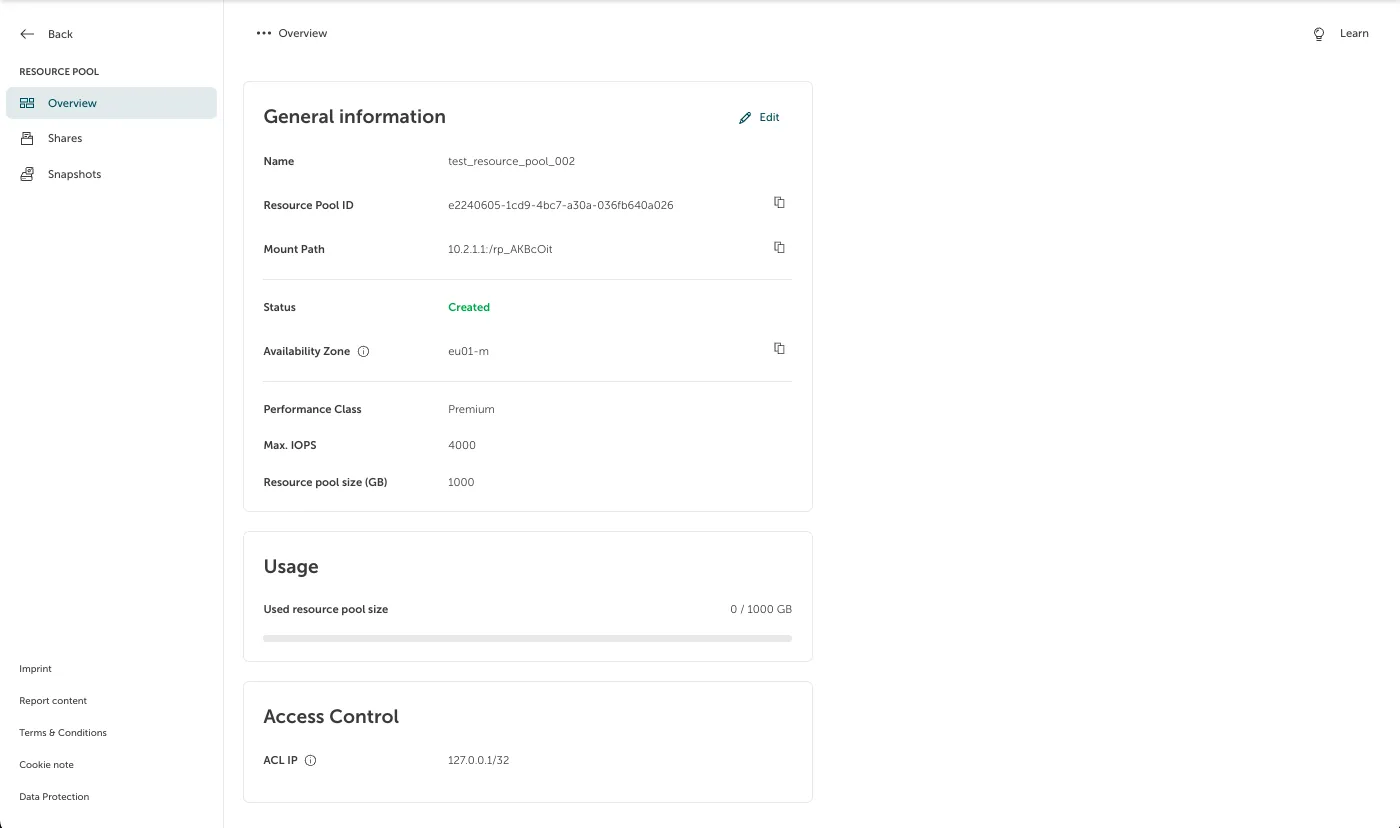
Screenshot of the detailed "Overview" configuration page for the specific resource pool "test_resource_pool_002" in the STACKIT Portal. The left column displays the "General information" card with an active "Edit" button, detailing technical attributes like the Resource Pool ID, Mount Path, and a "Premium" performance class. The right column displays stacked informational cards for "Usage", and "Access Control" defining an ACL IP.

This will allow you to, for example, change the performance class or size. Clicking on “Save” persists the change.
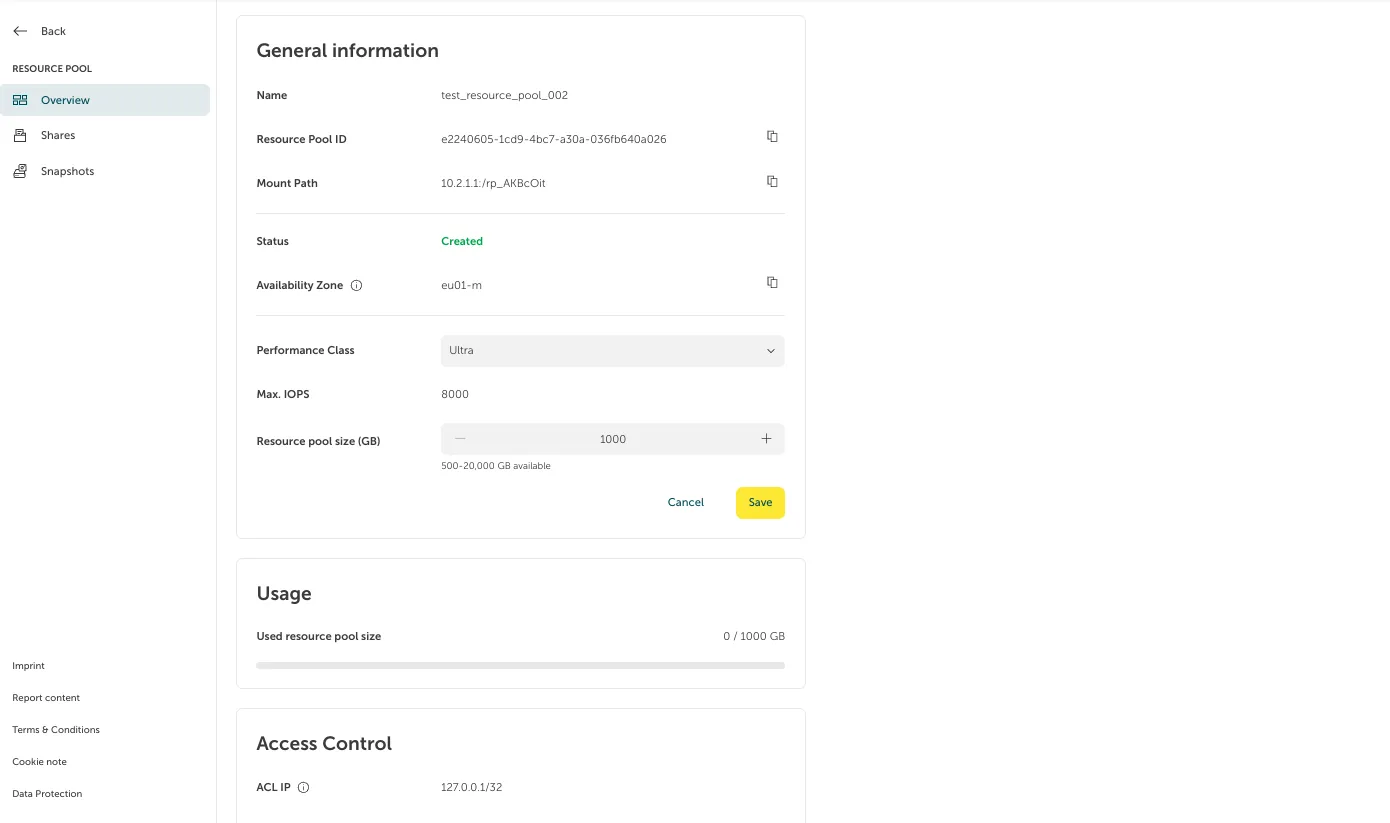
Screenshot of the active editing mode for the "test_resource_pool_002" configuration page in the STACKIT Portal. Within the "General information" card, the "Performance Class" field is now an editable dropdown menu changed to "Ultra" (showing Max. IOPS updated to 8000), and the "Resource pool size (GB)" field is adjustable with plus and minus buttons showing a value of 1000. At the bottom right of the card, a green "Cancel" link and a yellow "Save" button are available to persist or discard the changes.